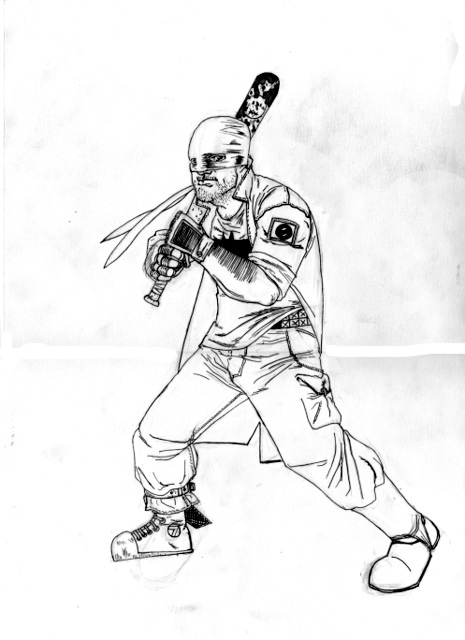
A talented guy I know on Your Mom’s Basement named Richard asked how to do separate layers. He’s computer illiterate. Even the Christian 3rd World Charities had to send someone to help him download porn.
This is his Batman.

The first thing that you need to do is make sure the drawing is in RGB. This allows color to be added and blah, blah, blah.
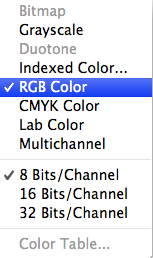
Next up is the channels. What are channels. All images are divided into channels. RGB is separated into a Red, Green and Blue channel. Each other them look grey, but the composite makes them in the color file you love.
You to the channels pallet from Windows >> Channels.
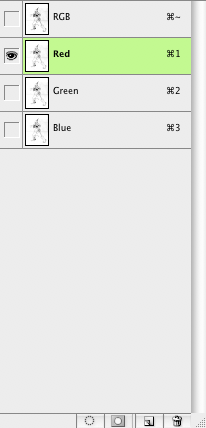
I prefer to use the Red channel. It seems to generally get all the black that you’ll need for this little project. Select the channel and then drag it to the little paper pad icon on the bottom of this window. It will make a copy that is very important for the next step. After you make the copy. Go back into the layers pallet.
Windows >> Layers
Create a new layer. A new blank layer.
Go to Select and Load Selection. Choose the channel, “Red Copy.” Click “Invert.” Click “OK.”
You’re going to have a selection of the the pencils that you laid down on paper. Now it’s time to color that in with black.
Select the paint bucket. Hit “D” on your keyboard. This makes the color swatch Black and White.
Hit a black point on the drawing. Just once.
Delete the locked background layer.
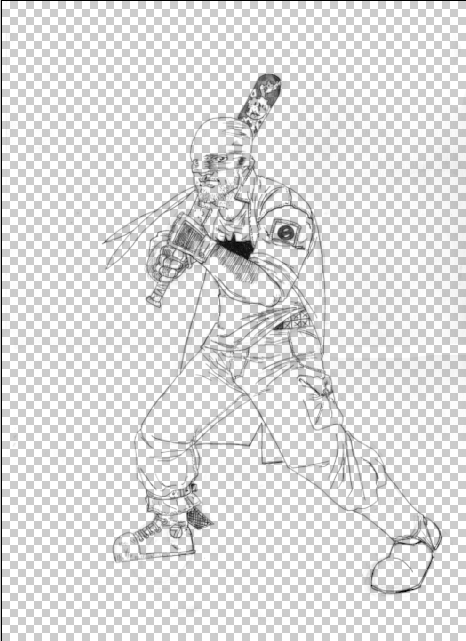
And this is what you should have.
BUT WE AREN’T DONE!
Add another layer and move it under the line art. Hit “X” on the keyboard. This switches the black and white color swatch. That new layer is your new background. Add white.
Now it’s time to start to the clean up. All the messy stuff that we never think of on the paper.